![]()
The Crazy Cartridge is a system to run programs (for example games, or your own homebrew software) on old video game systems and homecomputers like the Commodore 64 or the Vectrex. Insert the Crazy Cartridge into the retro system, connect it to the USB port of a PC or Mac, then upload your favorite game or your own program and play it on the original hardware. Or save the program on SD-card, to run it on your good old hardware without a connection to a PC or Mac.
Currently under development, but I plan to sell it (with all schematics and software released as open source and open source hardware). You can follow me on Google Plus for updates about the development, and when and where to buy it.
The system is made out of two boards: one controller board with a microcontroller, a CPLD and a SRAM, and individual boards for each supported retro system. The microcontroller provides the USB connection and the SD-card read/write functions and the CPLD emulates a ROM of the cartridges, in combination with the SRAM. This SRAM is 8 MByte big and can be used as a RAM expansion, too, for example to emulate a REU for the C64. The individual retro system boards are adapters for the different slot formats and does the 5V / 3.3V voltage level translation, if necessary. This concept makes the controller board useful for other applications as well, for example a base board with a VGA connector to implement your own video game system with it (the CPLD has 4,000 LEs and can be used to implement a simple CPU and a graphics controller on it).
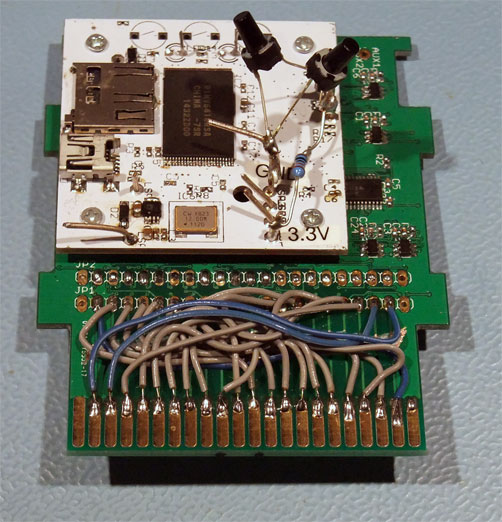
The C64 base board is working now, too. I placed the connector 180° rotated, but fortunately the C64 and the cartridge survived it and I could fix it with some wires:
I switched from LPCOpen for the FPGALink firmware to mbed, a nice C++ framework for ARM microcontrollers, because I think the code quality is better, and for me it is easier to write C++ programs than C programs. The Qt program can now check the IO ports individually, which was very useful to find some shorts at the tiny 30 pins connectors. With the current PC software and VHDL implementation, any Magic Desk CRT file can be loaded, as in my old cartridge. This means any PRG file can be loaded, too, with a converter, if it starts at $0801. The upload time over USB is very fast with FPGALink, less than a second for the 24 kB H.E.R.O. game:
Next I'll test the SD-card and then I'll fix the bugs on the PCBs for the final version.
Problems solved, all homebrew games and demos are are working, too, even the 64 kByte ones with PB6 bank switching scheme. I've written a game for the Retrochallenge contest to learn a bit about how to program the Vectrex:
The Vectrex base board is working:
Still some problems with newer homebrew games, but I'll debug it.
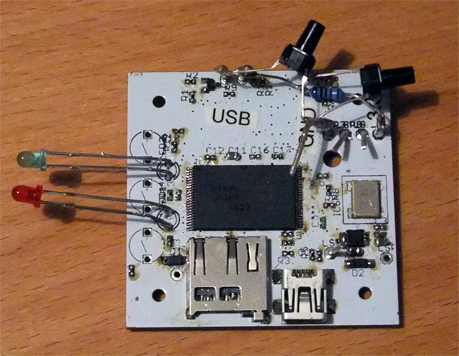
The first prototype boards arrived and I've soldered all components on the controller board. As always, some minor bugs, which I could solve with some wires and bridges, and some debugging keys and pins. This is the top side of the control board, where you can see the SRAM, the SD-card slot, USB connector and the 12 MHz oscillator:
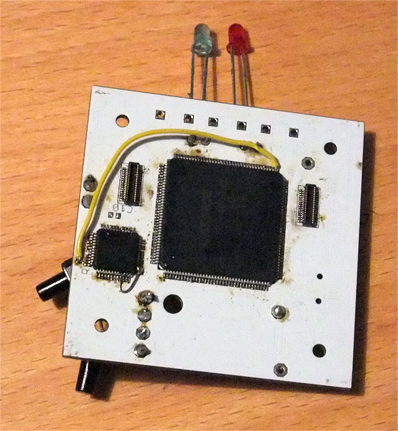
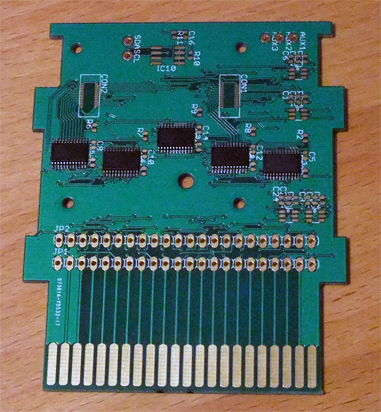
On the back of the board is the CPLD and the microcontroller, and two tiny connectors with 30 pins each, to connect to the individual base board:
The base board for the Vectrex, with the 3.3V / 5V level translators already soldered:
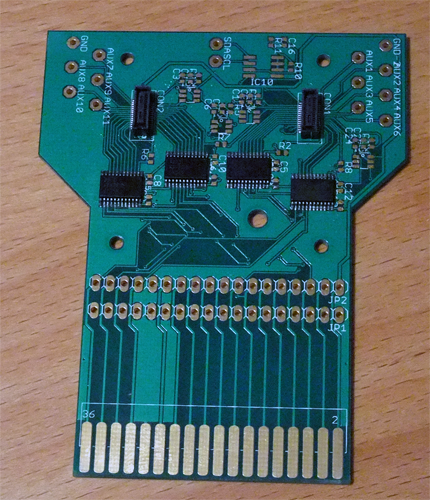
And the base board for the C64:
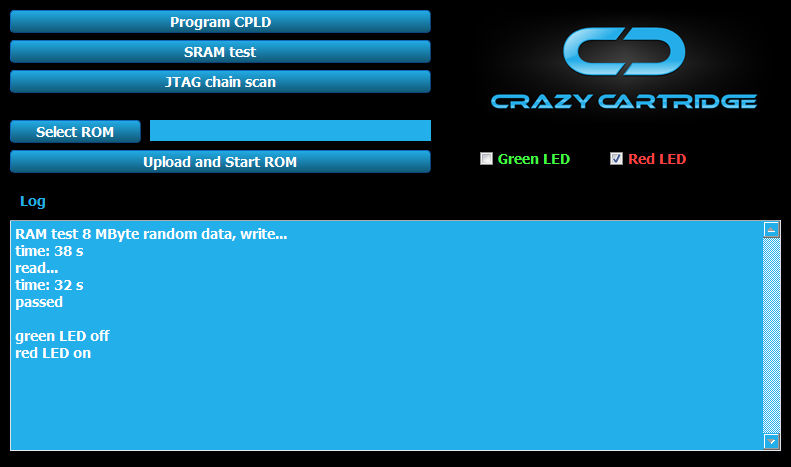
For testing the control board, I started to port FPAGLink for the LPC11U24 microcontroller, because currently FPGALink supports only FX2LP and AVR. There are still a lot to do, but so far I can send a JTAG programming file to the microcontroller over USB and then the microcontroller can program the CPLD. After programmed, I have a SPI communication link between the microcontroller and the CPLD and can use the FPGALink communication functions to chat from the PC with the CPLD. I've written a Qt application to send and receive commands and data, and the SRAM is working, too. A screenshot of the running Qt app:
Next step will be to finish the Vectrex board and then implement the VHDL code to emulate a Vectrex cartridge.